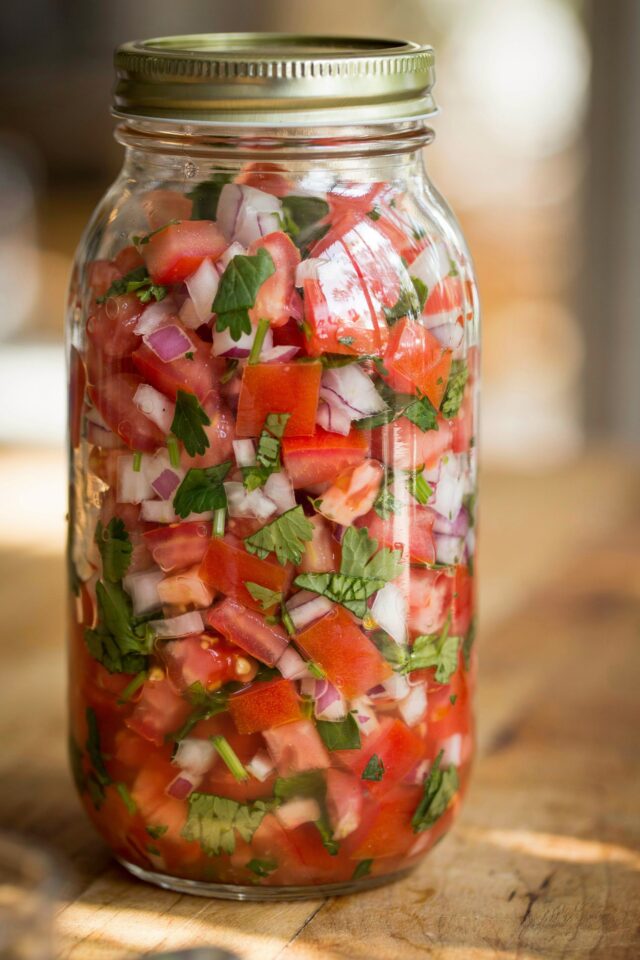
I still remember the first time I accidentally left a bowl of pico de gallo on the counter overnight. The next morning it smelled tangier, brighter, and somehow more alive. That happy accident led me down a rabbit hole of lacto-fermentation, and eventually to this fermentedpicodegallo recipe that has become a staple in my kitchen. Unlike the fresh version that wilts in a day, this probiotic salsa keeps developing flavor for weeks, and it does wonders for my digestion. If you have ever wanted to try homemade fermenting but felt intimidated, this is the perfect starting point.
Why I started fermenting my pico de gallo for gut health
I used to toss out half a batch of fresh salsa every week because it would turn watery or moldy. That felt wasteful and expensive. Then I learned that lactofermentation not only preserves vegetables but also boosts their natural probiotics. For anyone focused on guthealth, adding a spoonful of this tangy salsa to your meals is an easy way to support your microbiome without buying expensive supplements.
The process works because salt-tolerant lactic acid bacteria outcompete harmful microbes. They produce that signature sourness while making the nutrients more bioavailable. I noticed after eating this salsa regularly for two weeks that my bloating after heavy meals decreased noticeably. It is not a cure-all, but it became a simple habit that pays off.
Ingredients for the best homemade salsa ferment
You only need five simple components for this homemadesalsa. Freshness matters here because fermentation amplifies the quality of your produce. Do not use canned tomatoes or dried herbs. Here is what I use every time:
- 4 large ripe Roma tomatoes, diced into half-inch chunks (avoid overly soft or mealy ones)
- 1 medium white onion, finely chopped (red onion works too but turns a funny pink)
- 2 jalapeño peppers, seeds removed and minced (leave seeds if you like heat)
- 1 cup fresh cilantro leaves, roughly chopped (stems included for extra flavor)
- 1 ½ tablespoons fine sea salt (do not use iodized salt, it can inhibit fermentation)
Optional but nice: a peeled garlic clove or two, and the juice of half a lime added after fermentation ends (lime during fermentation can slow the process). I have tried adding other aromatics like cumin seeds, but they muddied the bright tomato taste. Keep it simple for your first batch.
Step by step: packing the jar for the best fermentation
Using the right vessel makes all the difference. I recommend a wide mouth quart jar because it lets you press the ingredients down firmly. After mixing the chopped vegetables with salt in a bowl, let them sit for ten minutes. The salt draws out moisture, which becomes your natural brine. Then pack everything into the jar, pushing down with a wooden spoon or your fist until liquid rises above the solids.
Leave at least an inch of headspace. Place a weight on top to keep the vegetables submerged. I use a small glass fermentation weight, but a clean ziplock bag filled with brine works too. Cover the jar with a cheesecloth or a loose lid. Do not seal it airtight, gases need to escape. Set it on a plate in case it bubbles over.
I learned the hard way that insufficiently packed jars lead to mold. The brine must cover every piece of onion and tomato. If after pressing the liquid does not reach the top, add a little filtered water with a pinch of salt dissolved in it.
How long to ferment and when it is ready
Fermentation time depends on your kitchen temperature. In my cool basement (around 68°F), this pico takes about 5 days to develop a pleasant tang. In a warmer spot it might be ready in 3 days. Taste a piece of tomato on day three. If it tastes pleasantly sour and the color has slightly dulled, it is ready. If it still tastes like salted vegetables, give it another day or two.
Once it reaches the sourness you like, move the jar to the refrigerator. The cold slows fermentation dramatically but does not stop it completely. The flavor will continue to deepen slowly over weeks. I have kept a jar for three months without any spoilage, though the texture softens over time. For the crispiest result, eat within the first month. This is where lactofermentation really shines, you get a living food that evolves with you.
Troubleshooting common issues with homemade ferment
Not every batch goes perfectly. The first time I tried this recipe, I saw white film on top and panicked. That was kahm yeast, harmless but funky smelling. I scraped it off and the salsa underneath was fine. Here are the issues I have run into
#fermentedpicodegallo #probiotics #homemadesalsa #lactofermentation #guthealth
Leave a Comment