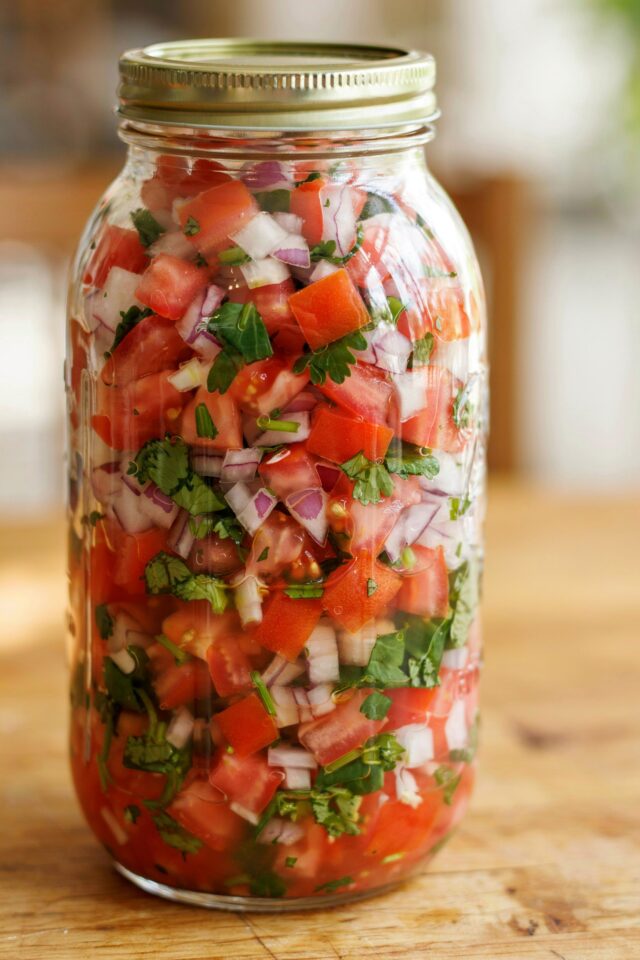
Why I Started Fermenting Salsa for Gut Health
My first batch of fermented pico de gallo came out of a failed attempt to keep fresh salsa from turning slimy in the fridge. I had been reading about probiotic foods and how they support digestion, but most recipes seemed complicated or required expensive starters. I wanted something simple, something I could make with vegetables from my garden. That is when I stumbled into wild fermentation.
After a few trials, I realized that fermenting salsa is actually easier than canning and way more forgiving than dairy ferments like yogurt or kefir. The natural lactobacillus bacteria on the vegetables do all the work. You just need salt, time, and a jar. The result is a tangy, crunchy condiment that tastes alive in a way store-bought salsa never does. Plus, every spoonful gives your gut a dose of live probiotics.
What You Actually Need for Homemade Salsa That Ferments
I have tested a few versions, and this ingredient list is the one that works every time. You do not need fancy equipment or exotic produce. Just grab these from your kitchen and garden.
- 4 medium ripe tomatoes (Roma or paste tomatoes hold up best)
- 1 small white onion (red onion works too, but it turns the brine pink)
- 2 jalapeños (remove seeds if you prefer mild heat)
- 1 large handful of fresh cilantro
- Juice of 1 lime (optional, but brightens the flavor)
- 1 tablespoon of fine sea salt (do not use iodized salt, it can slow fermentation)
- Filtered or non-chlorinated water (chlorine kills the good bacteria)
You will also need a clean quart jar with a lid. A wide-mouth mason jar is perfect. If you have a fermentation weight or a smaller jar that fits inside to keep the veggies submerged, that helps, but a simple cabbage leaf or a clean rock works too. I have used a small ramekin in a pinch.
My Step by Step Fermentation Method for Probiotic Salsa
I start by dicing the tomatoes, onion, and jalapeños into uniform small cubes. Chunky pico de gallo is the goal, so do not turn it into mush. Mince the cilantro finely. Toss everything into a mixing bowl and add the salt. Massage the salt into the vegetables with your hands for about a minute. This pulls out the natural juices and creates the brine.
If the mixture looks dry, add a splash of filtered water. Then pack everything tightly into the jar, pressing down so the liquid rises above the solids. Leave about an inch of headspace at the top. Screw the lid on loosely so gases can escape, or use a fermentation lid with an airlock. I prefer a regular lid left slightly cracked.
Set the jar on a small plate or tray to catch any overflow. Place it somewhere out of direct sunlight at room temperature (65 to 75°F is ideal). Let it sit for 2 to 5 days, depending on how tangy you like it. I usually taste it after two days and decide from there.
What to Expect During the Wild Fermentation Process
Day one: things look pretty normal, maybe a few bubbles near the surface. Day two: the brine gets cloudy, and you might see white foam. That is the lactobacillus partying. Do not panic. As long as there is no mold (fuzzy patches that are green, black, or pink), you are fine. A little white film or kahm yeast is harmless; just skim it off.
The tomatoes will soften slightly but should still have bite. Onions lose their raw sharpness and become almost sweet. The heat from the jalapeños mellows and blends. By day three, the whole jar smells tangy and bright, like a cross between salsa and sauerkraut. That is when I usually move it to the fridge.
One thing I learned the hard way: do not seal the lid tight during fermentation. I did that once, and the pressure built up, causing the jar to pop open and spill salty salsa all over my counter. Trust me, loose lid or airlock only.
How to Use Your Fermented Salsa Beyond Tacos
This probiotic salsa is more versatile than you might think. Of course, it is amazing on tacos, but I also spoon it over scrambled eggs, mix it into avocado for quick guacamole, or dollop it onto grain bowls. The tang really cuts through rich dishes like black bean soup or cheesy enchiladas.
I have even used the leftover brine to kick-start a new batch of fermented vegetables. Just add a spoonful of the liquid to your next jar of chopped veggies, and the fermentation goes faster. The salsa itself keeps in the fridge for at least a month, though mine never lasts that long. The flavor continues to develop slowly, becoming more complex without getting too sour if you keep it cold.
Troubles
#FermentedPicoDeGallo #ProbioticSalsa #GutHealth #FermentationRecipes #HomemadeSalsa
Leave a Comment