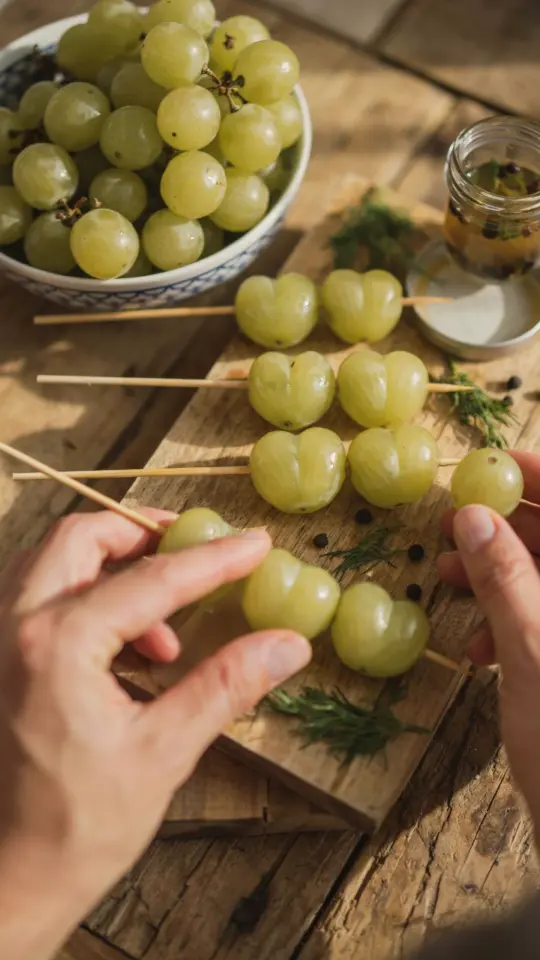
Have you ever tried pickled Thompson grapes? They are one of my favorite budget-friendly snacks to whip up in the kitchen. These sweet and tangy refrigerator pickles take just minutes to prepare and cost pennies compared to store-bought treats. Thompson grapes are seedless, easy to find, and soak up a simple brine of vinegar, sugar, and spices beautifully. Whether you are building a cheese board for guests or just craving something tangy and sweet, this homemade pickling recipe is a game changer for your wallet and your taste buds.
Why Thompson Grapes Are Perfect for Pickling on a Budget
I love using Thompson grapes because they are almost always the cheapest bag in the produce section. Their small size and thin skin mean the brine gets inside quickly, so you don’t have to wait days for flavor. Plus, since they are seedless, you can pop them straight into your mouth without any fuss. That is a huge win when you are trying to stretch your grocery dollars.
Another reason these grapes shine is their natural sweetness. You can use less sugar in your pickling brine and still get a candied, tart result. That small adjustment saves money over time, especially if you pickle in bulk. And because Thompson grapes hold their crunch even after a week in the fridge, you get a satisfying bite every time.
Simple Ingredients You Already Have (or Can Swap Cheaply)
You do not need fancy vinegars or exotic spices for this recipe. White vinegar, granulated sugar, and a few pantry staples are all it takes. Here is what I typically use:
- 2 cups Thompson grapes, washed and stems removed
- 1 cup white vinegar (apple cider vinegar works too, and it is often on sale)
- 1/2 cup sugar (reduce to 1/3 cup if you like less sweet pickles)
- 1/2 cup water
- 1 teaspoon salt (kosher or table salt is fine)
- Optional spices: a cinnamon stick, 3 whole cloves, or a slice of fresh ginger
I usually buy grapes in bulk when they are on sale, then freeze half for smoothies and use the rest for pickling. That way I get two uses from one bag. The vinegar and sugar cost almost nothing if you already buy them for other cooking. This recipe is truly a zero-waste, low-cost project.
Step by Step Pickling Process (No Special Equipment Needed)
You do not need canning jars or a water bath for this recipe. A clean glass jar with a tight lid works fine. Start by washing and drying your grapes well. Any extra moisture can dilute the brine, so pat them dry with a towel.
In a small saucepan, combine the vinegar, water, sugar, salt, and any spices you chose. Bring it to a gentle boil, stirring until the sugar and salt dissolve completely. Remove from heat and let the brine cool for about 10 minutes. If you pour hot brine over grapes, they will soften too much. You want the liquid warm, not boiling.
Pack the grapes into your jar, leaving a little room at the top. Pour the warm brine over them until they are fully submerged. Screw on the lid and let the jar cool to room temperature, then pop it in the fridge. In 24 hours you will have sweet and tangy pickled grapes. They get even better after two or three days.
How to Customize the Flavor Without Breaking the Bank
The basic brine is a blank canvas. For a spiced version, add a star anise or a few black peppercorns. I sometimes throw in a dried chili for a little heat. Fresh herbs like rosemary or thyme also work, and you can often find them growing in a neighbor’s garden or on sale for a dollar at the market.
If you want a more savory pickle, swap half the sugar for a teaspoon of honey or maple syrup. Your wallet will thank you because you use less of the expensive sweetener. You can also try different vinegars: red wine vinegar gives a deeper color and richer taste, while rice vinegar makes it milder. Each small change creates a new snack without buying extra ingredients.
Creative Uses for Pickled Grapes (Beyond Snacking)
These grapes are not just for eating straight from the jar, though that is my favorite way. Try them on a cheese board with sharp cheddar and crackers. The sweet tang cuts through rich cheese beautifully. I also chop them and fold into chicken salad or tuna salad for a pop of acidity. They work great in grain bowls or on top of roasted pork.
For a quick appetizer, spear a pickled grape with a toothpick and wrap it in a slice of salami. That little bite costs almost nothing to make but looks impressive at parties. And because the grapes keep for weeks in the fridge, you can always have them ready for last-minute guests. That alone saves money on takeout appetizers.
Storage Tips and How Long They Last
Store your pickled Thompson grapes in a sealed jar in the refrigerator. They will stay crisp and flavorful for up to three weeks. I usually label the jar with the date so I remember when I made them. After about four weeks, the texture starts to soften, but they are still safe to eat if the brine looks clear and smells normal.
If you want to keep them longer, you can freeze the pickled grapes. They will not be as crunchy after thawing, but they are great in smoothies or braised dishes. Just pour the brine and grapes into a freezer-safe container, leaving a little headspace. Thaw in the fridge overnight before using. That is a great way to enjoy summer grapes all winter long without spending extra.
Try This Easy Recipe
#PickledGrapes #ThompsonGrapes #HomemadePickles #EasyPicklingRecipe #SweetAndTangySnack
Leave a Comment