Why Your Beet Kvass Turns Out Flat or Moldy (and How to Fix It)
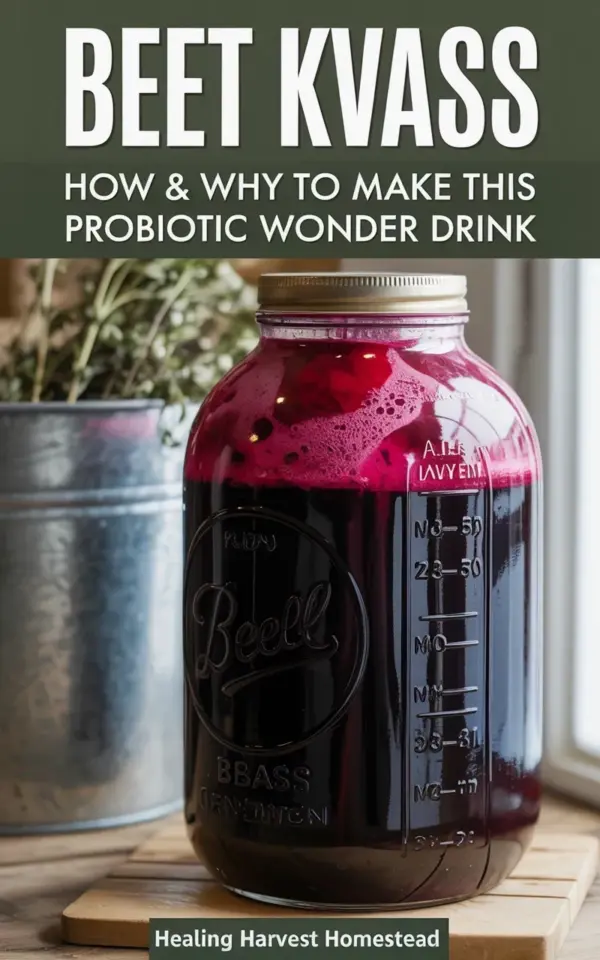
Honestly, I still get a little thrill every time I pour a glass of my homemade beet kvass. That deep red liquid, burgundy at the bottom fading to bright crimson at the top, with that cloudy fermented haze, it’s the prettiest thing in my refrigerator. And it’s a probiotic drink that’s done serious favors for my gut health. My favorite photo of it shows a big glass jar with printed measurement markings, and there’s a metal container with dried herbs in the blurry background. But let me tell you about the mistakes I made first, so you don’t have to repeat them. Look, I’ve been there. My first batch of beet kvass looked beautiful for exactly one day. Then it went cloudy in a bad way, and a week later I found a fuzzy gray bloom on top. I almost quit right then.
Here’s the thing: most beet kvass failures come down to four basic errors. Get these right and you’ll be sipping that gorgeous red fermented drink in no time.
- Skipping the scrub. You don’t need to peel the beets, but you absolutely must wash off every bit of dirt.
- Using tap water that’s heavily chlorinated. It kills the good bacteria.
- Opening the jar every single day to peek. Let it breathe only when you’re burping it.
- Packing the jar so full that the liquid has no room to bubble and expand.
The most common one of all? Overly processed beets. Which brings me straight to the next mistake.
The Biggest Mistake: Using the Wrong Beets
Ok so, not all beets are created equal. You want fresh, firm beets, the ones with the greens still attached if you can find them. Avoid the pre-cooked, vacuum-packed beets from the grocery store. You know the ones, they taste like nothing and have that weird slippery texture. They simply don’t ferment well. Also, skip any beets that look wrinkled or feel soft. They’re past their prime and will bring unwanted bacteria to your brew.
I once used a beet that had been sitting in my crisper drawer for three weeks. My kvass tasted like dirt and regret. If you wouldn’t roast it and eat it, don’t ferment it either. Trust me on this. A good beet is heavy for its size, with smooth skin and no cracks. That’s the foundation of everything else.
Salt Ratios and Why They Matter More Than You Think
For two cups of chopped beets, I use a teaspoon of fine sea salt. That’s my ratio. You see, salt is not just for flavor. It’s the gatekeeper. It keeps the good bacteria thriving while discouraging the bad ones. Too little salt and you’re inviting mold. Too much and you’ll get something that tastes like a pickle’s sad cousin. Measure it. Don’t guess.
And use unchlorinated water. Chlorine is the enemy of fermentation. If your tap water smells like a swimming pool, let it sit out overnight or just buy a jug of filtered water. Honestly, this one detail can completely change your results. I learned that the hard way when my first batch went fuzzy because I was too lazy to check the water.
Forgetting the Foam and Fizz: Signs Your Ferment Is Working
Here’s the thing: a healthy beet kvass doesn’t look like a still juice. It gets cloudy, yes, but it also builds a layer of froth on top. Sometimes you’ll see tiny bubbles rising from the bottom. That’s the good stuff. That’s the fermentation actually happening. If you don’t see any bubbles after three days, something’s off. Maybe your kitchen is too cold. Beets ferment best at room temperature, around 68 to 75 degrees Fahrenheit.
I put my jar on top of the fridge where it’s a little warmer. Just remember to burp the jar every day. That means cracking the lid for half a second to let the pressure escape. You don’t want a beet kvass explosion on your ceiling. Trust me, that’s not a fun cleanup. The liquid will also develop that beautiful gradient, the burgundy sinker at the bottom, the bright crimson at the top. That’s your signal that things are moving in the right direction.
How to Avoid the ‘Too Sweet’ or ‘Too Sour’ Trap
Beet kvass starts out sweet from the beets, then gradually turns tart as the fermentation progresses. The longer you let it go, the sourer it gets. For me, the sweet spot is around 5 to 7 days. At that point it has a pleasant tang without being a vinegar bomb. In a warm kitchen it might be ready in 4 days. In a cool basement, maybe 10.
The trick is to taste it daily starting on day three. Use a clean spoon each time. When you think, “oh, that’s nice,” that’s your cue. It will keep fermenting in the fridge, just more slowly, so you have a buffer. A word of caution: the last time I left mine for two weeks and it turned into something that could strip paint. I still drank it, but I had to hold my nose. Anyway, that was a lesson learned. You don’t need to be a martyr for gut health.
Storing and Drinking Your Beet Kvass Without Regret
Once your kvass is where you want it, cap it tightly and move it to the fridge. It’ll last for at least a month, probably longer. I keep mine in a jar with measurement markings so I can see the gorgeous color shift every time I open the door. That visual never gets old. The cloudy, fermented look actually means it’s alive, which is exactly what you want.
A shot glass in the morning is my go-to. You don’t need a full mug, this stuff is potent. Some people like to mix it into a smoothie or use it in salad dressings. Honestly, I just enjoy it straight, chilled, and a little fizzy. It’s the kind of healthy habit that doesn’t feel like a chore because it tastes good. And if you’re new to fermented drinks, start small. Half a shot, maybe. Let your gut ease into it.
Making beet kvass is one of those kitchen
#beetkvass #probiotic #fermenteddrink #guthealth #fermentation
Leave a Comment