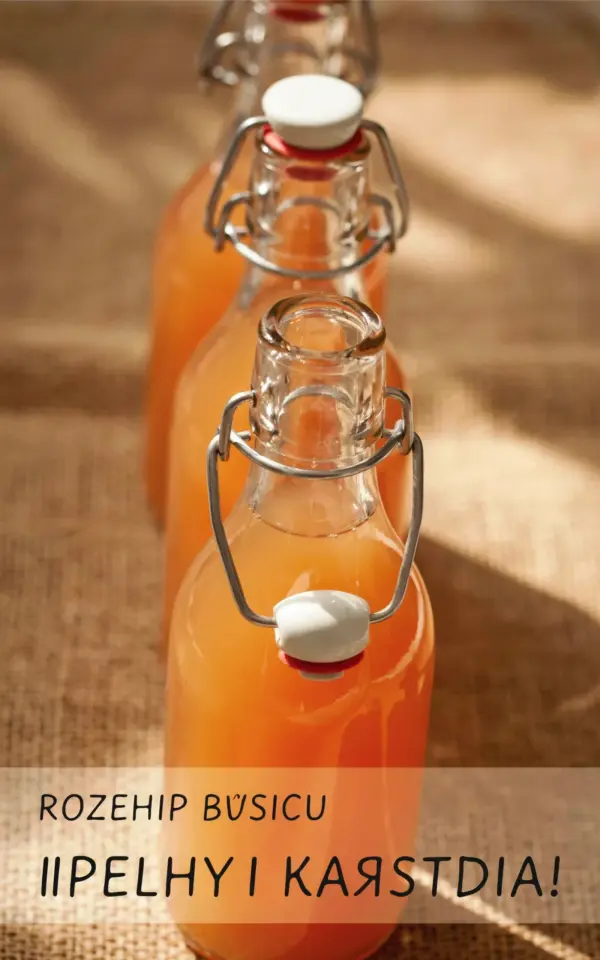
It’s the end of September, and your rose bushes are heavy with bright red hips. You’ve watched them swell all summer, and now they are sitting there, waiting for you to do something that isn’t just making jam. Fermented rosehip soda is the answer, and honestly, it’s about the easiest wild ferment you’ll ever pull off.
I started making this probiotic drink two seasons ago after a particularly aggressive harvest that left me with a gallon bag of hips and zero inspiration. My grandmother would have made syrup or vinegar, but I wanted bubbles. Real, living fizz that comes from a wild starter, not a SodaStream canister. The result was a shockingly elegant glass of rosy, tart-sweet soda that tastes like autumn in a way that’s hard to describe.
This recipe leans heavily on the “wild” part of wild fermentation. You are not adding commercial yeast or a SCOBY. Instead, you are coaxing the natural yeasts living on the skins of the rosehips (and the sugar you feed them) to create a gentle, probiotic-rich fizz. It is a small, reliable science experiment that sits on your counter, and it usually works on the very first try.
Of course, you need to know which hips are safe. If you have ever foraged for crabapples or juniper, the rules are similar. Avoid hips that are mushy, blackened, or have been sitting in a roadside ditch picking up exhaust fumes. Look for firm, glossy hips that give slightly when squeezed. The flavor varies wildly between species, so do not panic if your batch tastes different from mine. That’s the whole point of doing this at home.
—
Why Foraging for Rosehips Is the Best First Step
Rosehips are the fruit of the rose plant, and they are a powerhouse of vitamin C, often containing several times more than an orange. But for this drink, their real value is the microbial load on their skin. These wild yeasts are resilient and hungry.
You want to pick them after the first light frost if you can manage it. That chill converts some of the starches to sugar and makes the hips slightly sweeter and softer. If you live somewhere mild like I do, you can also just freeze your harvested hips for 48 hours before starting, which mimics the frost and softens the outer layer.
The best time to gather is late morning, after the dew has burned off. Dry skin means less chance of mold during the early stages of fermentation. But don’t stress over the quality of your foraging too much. A decent handful of clean, unblemished hips is all you need for a half-gallon batch. They are forgiving little things.
—
What You Need for This Probiotic Drink Experiment
Before you start, let me save you a headache. Do not use chlorinated tap water, as it will kill the wild yeast you are trying to cultivate. Use filtered or spring water. Also, do not use a sealed bottle that cannot release pressure. You are creating carbon dioxide here, and that gas needs somewhere to go.
Look, the equipment list is short, but the details matter. You need a large glass jar for the initial ferment, a fine-mesh strainer or cheesecloth, and swing-top glass bottles for the second phase.
– **Jar size:** A 2-liter or half-gallon mason jar works best for the first ferment.
– **Sweetener:** Regular white cane sugar works best. Honey is funky and can produce a slightly medicinal flavor, so save that for a different batch.
– **A couple of raisins:** This is a bit of an old wives’ tale, but they help feed the yeast and add a little tannic depth. Use them if you have them, skip them if you don’t.
– **A piece of cheesecloth or a coffee filter:** To cover your jar and let the brew breathe during the initial fermentation.
One more thing: wash your jars with hot soapy water, but do not use antibacterial soap or harsh bleach. You want to sanitize, not sterilize completely. A trace of good bacteria is totally fine and even helpful here. Just make sure there is no soapy residue left.
—
Your First Rosehip Syrup: The Base for the Fizz
Now we get to the actual hands-on part, making the sweet rosehip base that the yeast will eat. Start by rinsing your rosehips in cool water and removing the little black tips and any stem remnants. Prick each hip once with a sterilized needle or a sharp paring knife. This is tedious, but it gives the water and yeast access to the interior, which contains the sugars and flavor.
Take your prepared hips and weigh them. You want about 1 cup of prepared hips. Crush them gently with a clean rolling pin or the back of a spoon. This breaks the flesh without shredding the seeds and the tiny irritating hairs inside. If you grind too hard, those hairs get into the liquid and they are itchy and unpleasant to drink.
Combine the crushed hips in your large jar with:
– ½ cup of sugar
– 4 cups of filtered water
– A small knob of fresh ginger, grated (about a teaspoon)
– Two raisins or a splash of kombucha (optional, but helps kickstart things)
Stir it all together until the sugar dissolves completely. This liquid is your fermentation broth. The color will be a pale, cloudy blush. It will smell quite green and earthy at this stage, like the forest floor after a rain. If it smells like rotting fruit or stinky gym socks, you have a problem, but that is rare with a fresh batch.
Cover the jar with your cloth and secure it with a rubber band. Let it sit at room temperature, out of direct sunlight, for 2 to 3 days. Stir it vigorously twice a day, in the morning and at night. The stirring incorporates oxygen, which is essential for the wild yeast to multiply before they switch to anaerobic respiration to create bubbles.
—
Bottling and the Bottle-Burping Schedule
After a few days, you will notice the liquid has changed. It might look slightly frothier, with a hint of cloudiness and a sour-pungent aroma. That is the smell of success. You are looking for a tangy scent, like sourdough starter mixed with a slightly floral perfume.
Strain the liquid through a fine-mesh sieve lined with a few layers of cheesecloth. Do this over a bowl, and press firmly on the solids to extract as much liquid as possible. You will be left with a beautifully colored liquid that is still flat. Discard the solid rosehip matter, or better yet, compost it.
Now pour the strained liquid into your swing-top bottles. Leave at least 1.5 inches of headspace at the top. Seal them and leave them on the counter for another 24 to 48 hours. This is where the magic happens. The trapped wild yeast will start consuming the remaining sugar and excreting carbon dioxide, which dissolves into the liquid and creates that lovely, gentle fizz.
This is the bottle-burping stage. Twice a day, open the top of each bottle just a crack to release the pressure. If you skip this, you run the risk of a glass bottle exploding from the pressure build-up. It’s not just a concern, it has actually happened to a friend of mine who fell asleep and forgot about his batch. Glass shards everywhere. Just burp the bottles like you would a soda from the store, if you are that patient.
—
How to Troubleshoot Flavor and Carbonation Issues
Not every batch is going to be perfect, and that is perfectly okay. The first time I made this, I let the second ferment go for too long, and I ended up with a drink that tasted like a salty, sour champagne. It was intense. Drinkable, but intense. Here is the thing: the temperature of your kitchen matters hugely.
A hot house will ferment fast, in under 24 hours, and can turn sharply acidic. A cooler room will take its sweet time, up to 3 days, and will yield a cleaner, fruitier taste. If you find your soda too dry, add a little syrup or a pinch of stevia to the glass before drinking. If it is not fizzy enough, just leave it out longer next time or add a tiny pinch of raw sugar to the bottle.
If you see anything fuzzy growing on the top of the liquid, that is mold and you need to toss the entire batch. A thin, white, chalky film on the surface is a harmless yeast bloom, just like what you see on a jar of sauerkraut. Mold is usually green, black, or pink and will smell like a wet basement.
—
Flavor Variations: Rosehip and Spice Combos to Try
Once you have the basic recipe down, you can start playing around. The rosehip flavor is delicate, and it plays really well with warming spices. In the fall, I like to add a cinnamon stick and a slice of fresh orange peel to the initial fermentation jar. It gives the final sodas a kind of mulled-wine vibe, without the alcohol or the heat.
For a summer-spring batch, try adding a handful of fresh lemon balm or a sprig of mint. The bright, green flavors cut through the earthy tang of the rosehips. For a deeper, earthier brew, toss a few dried goji berries or a tablespoon of hibiscus petals into the first ferment. Honestly, the hibiscus version turns a shocking shade of neon pink, and it looks amazing in a tall glass with ice.
If you are feeling adventurous, use half apple juice and half water in the base instead of all water. That is a game changer. The apple cider yeast and the natural sugar in the juice create a very robust fermentation. Just keep the total sugar the same, or you will end up with rocket fuel and a very aggressive bubbling action in those swing-top bottles.
—
At the end of the day, this fermented rosehip soda is a deeply rewarding project because it gives you a tangible result in less than a week. It is not a sourdough loaf that requires a decade of feeding a starter. It is a fast, vibrant, gut-healthy little celebration of the wild yeasts living all around you.
Store your finished bottles in the fridge to halt fermentation. The cold will push the yeast into a dormant state, preserving the sweetness and the fizz. You should drink it within two weeks, though it rarely lasts that long in my house. Let me know if you give it a shot, and tag me when you post your batch, I love seeing those bubbles.
Leave a Comment