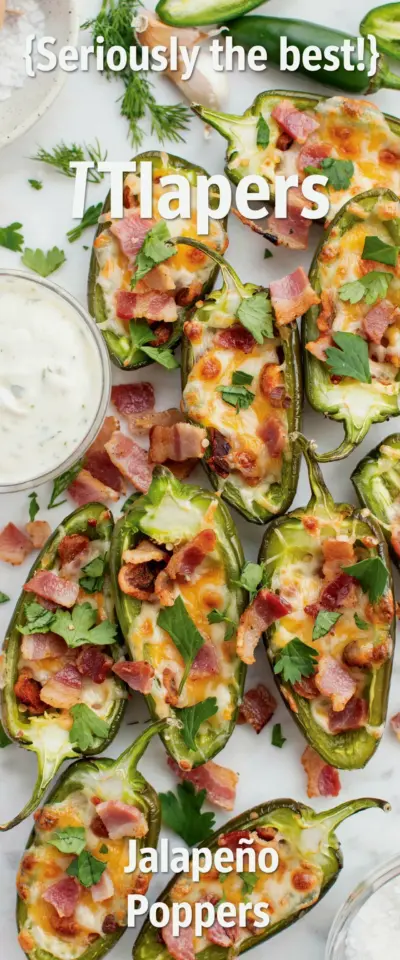
Jalapeno poppers are my go to budget friendly party appetizer. I stuff halved jalapenos with a simple cream cheese and bacon mixture, and it’s so easy and affordable. But I’ve made plenty of mistakes over the years. If you’ve ever ended up with bland, soggy, or overly spicy poppers, you’re not alone. Here are the most common mistakes and how to fix them so your next batch is perfect for game day or any gathering without breaking the bank.
Choosing the Wrong Jalapenos for Poppers
Not all jalapenos are created equal. I used to grab the biggest ones I could find, thinking more surface area meant more filling. Bigger jalapenos often have thicker walls and milder heat, which can leave you with a sad, bland popper. The smaller ones tend to be hotter and more tender.
Look for jalapenos that are firm, smooth, and about 3 to 4 inches long. They should feel heavy for their size. Avoid any with soft spots or wrinkles. If you want consistent heat, pick peppers that are similar in shape and color. Dark green ones are usually spicier than lighter ones.
Not Precooking the Bacon
Raw bacon wrapped around a cream cheese filling sounds good, but it turns greasy and chewy. You need to precook the bacon until it’s crispy but not burnt. Then chop it into small bits. This way the smoky flavor stays, but the grease doesn’t pool inside the popper.
I like to cook my bacon in a skillet over medium heat, then drain it on paper towels. Let it cool before mixing it into the cream cheese. If you’re using bacon bits from a jar, be careful. They can be salty and lack real bacon flavor. Real bacon is worth the extra few minutes.
Skimping on the Cream Cheese and Bacon Ratio
A common mistake is using too much cream cheese and not enough bacon. You get a dense, one note filling. A good ratio is about 8 ounces of softened cream cheese to 4 strips of cooked, crumbled bacon. That gives you a creamy base with enough salty, smoky bits in every bite.
I also add a pinch of garlic powder and a handful of shredded cheddar. The cheddar helps the filling set up nicely and adds a little tang. Mix everything well so the bacon is evenly distributed. Taste the filling before you stuff the peppers. Adjust the salt if needed, but remember the bacon is already salty.
Overstuffing or Understuffing the Peppers
You want a generous mound of filling, but not so much that it spills out during baking. When the filling overflows, it makes a mess and the peppers end up misshapen. On the other hand, too little filling leaves you with a hollow popper that feels like a tease.
Use a small spoon to fill each half. The filling should be slightly domed above the pepper edge. Smooth it with the back of the spoon. If you’re worried about overflow, you can press a little bit of shredded cheese on top to hold everything together. It melts into a little golden cap.
Baking at the Wrong Temperature
I used to bake poppers at 350°F because I was afraid of burning them. The filling would get hot, but the pepper stayed firm and raw inside. The perfect sweet spot is 400°F. It crisps the bacon, softens the pepper without turning it to mush, and browns the cheese.
Line your baking sheet with parchment paper or a silicone mat. Arrange the poppers cut side up. Bake for 20 to 25 minutes, then switch to broil for the last 2 minutes if you want a little extra color on the tops. Keep an eye on them. Broilers vary a lot, and you don’t want burnt poppers.
Not Letting the Poppers Rest Before Serving
Hot cream cheese straight from the oven is a burn risk. It holds heat like lava. Let the poppers sit on the baking sheet for five minutes before you move them to a platter. This allows the filling to firm up a bit and the peppers to cool to a safe, but still warm, temperature.
During this rest, the flavors also settle. I sometimes sprinkle a little chopped fresh cilantro or green onion on top right when they come out. The residual heat softens the herbs just enough. If you skip the rest, the poppers will fall apart when you try to pick them up.
Forgetting Budget Friendly Swaps
Jalapeno poppers can get expensive if you use premium ingredients. But this is a budget appetizer, so lean into smart swaps. Instead of full fat cream cheese, use the store brand. It works the same. Bacon ends and pieces are cheaper than center cut strips. They crumble just fine.
If fresh jalapenos are pricey, check the frozen section. Some stores sell bags of stemmed, halved jalapenos. They work well for stuffed poppers. You can also use pickled jalapeno halves, but reduce salt in the filling. Budget friendly doesn’t mean low quality. It means knowing where to save without losing flavor.
- Use store brand cream cheese.
- Buy bacon ends or bulk bacon.
- Look for frozen or pickled jalapenos on sale.
- Shred your own cheese from a block, cheaper than pre shredded.
- Skip the fancy breadcrumbs, just use plain panko if you want a crunchy top.
These swaps keep the cost down and the taste high. I’ve made a batch of 24 poppers for under ten dollars. That’s a steal for a party appetizer that disappears fast.
Putting It All Together for Perfect Poppers
Now you know the pitfalls. Pick the right peppers, cook the bacon crisp, measure the filling, bake at 400°F, and let them rest. Stick to these steps, and you will have poppers that are creamy, smoky, spicy, and budget friendly every time.
This recipe works for game day, potlucks, or a simple snack. You can double it easily. Just use two baking sheets and rotate them halfway through. If you have leftovers, store them in the fridge and reheat in the oven or air fryer. They won’t last long anyway.
Save this recipe for your next gathering. Try it your way and let me know how it goes. I love hearing about your versions and any creative twists you add.
#jalapenopoppers #appetizer #partyappetizer #budgetrecipes #bacon
Leave a Comment