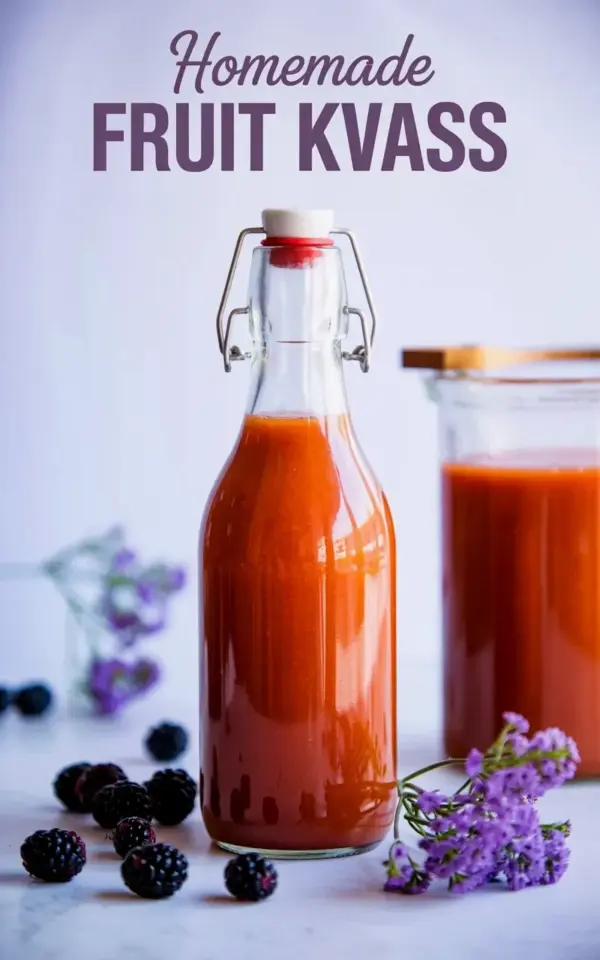
There’s a glass bottle of homemade fruit kvass sitting on my counter right now, glowing that exact orange-red shade you see in the photo. It’s blackberry, it’s fizzy, and it’s honestly the prettiest thing in my kitchen. Look, I know fermenting drinks sounds like a project for someone with more patience than me. But this fruit kvass is ridiculously approachable. If you can stir sugar into water and wait a few days, you can absolutely pull this off. And that swing-top bottle? It makes the whole thing feel like a tiny apothecary experiment, complete with little purple flowers and scattered blackberries on the counter.
## Why Blackberry Kvass Is the Perfect First Ferment
Blackberries are not shy. When you drop them into a jar with sugar and water, they go to work immediately, turning the liquid into that deep, jewel-toned orange-red within a day. It’s a dramatic transformation. Most ferments look like nothing is happening for a week, but berry kvass gives you that visual payoff fast. That alone is worth trying.
There’s also something forgiving about this particular fruit. Cranky berries that are slightly past their prime work beautifully. I’ve used a punnet that was a little bruised and soft, and the ferment actually seemed happier for it. The natural yeast and wild bacteria on the skins do the heavy lifting, so you don’t need a fancy starter culture. Just fruit, water, and sugar. It honestly feels like a magic trick, but the science is simple: the microbes eat the sugar, produce bubbles, and leave you with a drink that’s tangy, slightly sweet, and alive.
## What You Need for Easy Homemade Fruit Kvass
Ok so, equipment first. It’s a short list, and you probably own most of it already. The only real luxury item is a swing-top bottle, which is worth it for the seal and the satisfying pop when you crack it open.
– A clean glass jar (a quart or liter mason jar works great)
– A swing-top bottle for the second ferment (like the one in the photo)
– Cheesecloth, a clean dish towel, or a coffee filter for covering the jar
– A wooden spoon or rubber spatula for stirring
– Fresh blackberries, about two cups
– A third of a cup of sugar (white, cane, or coconut sugar)
– Filtered water, because chlorine can kill your wild yeast
Don’t overthink this. If you don’t have a swing-top bottle, you can use a mason jar with a tight lid for the second ferment, but you’ll need to burp it daily. The swing-top bottle releases pressure more reliably, and honestly, it’s half the charm.
## The 3 Day Ferment Process: Fruit Kvass Made Simple
Here’s the thing: this drink does not ask for your attention every day. Day one, you’re just combining things and covering the jar. Toss the blackberries in, add the sugar, then pour in the filtered water. Give it a vigorous stir so the sugar dissolves and some of the berries break open. Cover the jar with the cloth and secure it with a rubber band. Then walk away.
Day two, give it a stir. You’ll notice some bubbles and a slightly fruity, yeasty smell. That’s good. Tape a small piece of paper to the jar and write the date, so you don’t lose track. Day three, it should look noticeably more vibrant, with a frothy layer on top. Taste it. You want a balance of sweet and tart, with a gentle fizz. If it tastes like flat berry water, leave it one more day. If it tastes pleasantly sour and almost like a mild lemonade, you’re ready for bottling.
## How to Transfer and Fizz Up the Swing-Top Bottle
Alright, this is the step where the magic happens. Strain the kvass through a fine mesh strainer into a measuring cup or bowl with a spout. You can push on the berries to extract the liquid, but don’t go overboard or you’ll get a cloudy drink. Discard the spent berries. They’ve done their job.
Pour the strained kvass into your swing-top bottle, leaving about an inch and a half of headspace at the top. Seal it and let it sit at room temperature for 8 to 12 hours. This is the second ferment. The remaining yeast will produce carbon dioxide, and the bottle will pressurize. After that, move it to the fridge. The cold stops the fermentation process. I know you’ll be tempted to crack it earlier, but the chilling is what makes it crisp and gives you that really clean, commercially fizzy feel. Uncork it over the sink the first time, just in case.
## Troubleshooting Tangy Homemade Kvass Problems
Sometimes things go a little sideways. That’s fine, it’s still drinkable ninety percent of the time. If your kvass is flat, the original ferment didn’t go long enough, or you killed the yeast with tap water that was too chlorinated. Next batch, leave it an extra day before bottling, and make sure you use filtered water.
If it tastes too strongly of vinegar, that means it fermented too long. It’s not dangerous, it just tastes like a tart berry shrub. You can mix it with soda water and a splash of honey to balance it. And the classic one: it explodes. Not literally like a bomb, but it can geyser over your kitchen when you pop the cap. That generally means the second ferment went too long. I learned this the hard way and mopped the fridge. Anyway, keep a glass nearby and open it over a tray until you get a feel for your room’s temperature.
If you see little floaty bits, don’t panic. That’s just yeast sediment, harmless and a sign it’s alive. Some people strain it twice, but I don’t mind a little haze. It makes it look properly homemade.
## Small Batch Blackberry Kvass Tips for the Cozy Countertop Vibe
The white background and scattered berries in that product shot bring out an apothecary mood, and you can just as easily recreate this on a standard kitchen counter. The bottles are usually a dark amber or glass with a green tint, but a clear one looks beautiful when the kvass is that vivid orange-red. Put a couple of fresh blackberries in the bottom of the glass when you pour it over ice. It doubles as a pretty garnish and gives you one last burst of flavor. Those tiny purple flowers scattered around are probably borage or chive blossoms, honestly they’re just for looks, but they make the whole thing feel intentional. I like to set my bottle near a sunny window for an afternoon just to admire the color before I move it out of the light. Fermentation doesn’t love direct sun, but a few minutes for a photo is fine.
Here’s a last practical tip: label your bottle with the date you sealed it. Kvass in the fridge will keep for about two weeks, but it does get more sour as it sits. It’s never going to go “bad” like spoiled milk, it just becomes a more intense, tart drink. I’ve had a bottle last ten days and still taste great, just less sweet. If you want to make this a regular thing, keep a little of the liquid from the first batch in the fridge as a starter. Add it to your next jar of berries and sugar, and the fermentation will kick off faster and more reliably.
Anyway, that’s the whole process. No strange equipment, no daily babysitting, just fruit, sugar, water, and a little patience. You’ve already got the berries, go grab a clean bottle and start your batch today. When it’s ready, share a photo and tell me how it turned out, I’d love to see your swing-top bottle in action.
Leave a Comment