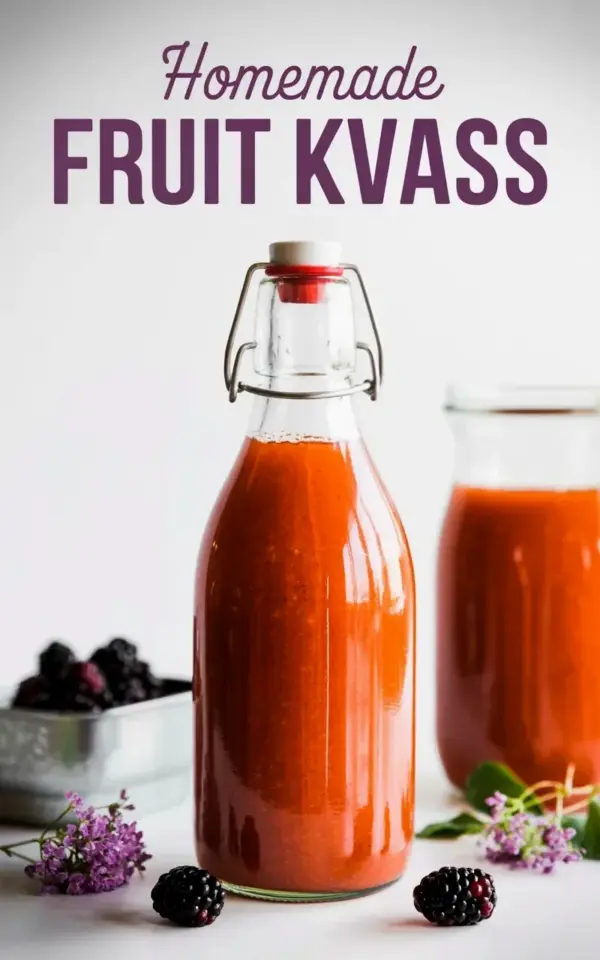
You don’t need a fancy fermentation kit or a pantry full of exotic ingredients to make something genuinely good for your gut. That bottle in the photo, the one with that gorgeous orange-red liquid and blackberries scattered around it, started with leftovers. Homemade kvass is one of the cheapest ferments you can make, and the fruit version is the easiest entry point I know. I have made kombucha that tasted like vinegar and sourdough that never rose, but this berry kvass? It worked on the first try, and it cost me less than a single bottle of store-bought probiotic drink.
The swing-top bottle in the image is the whole story. That bright color, the natural fizz, the little purple flowers on the table, it all comes together with just fruit, sugar, and time. No airlocks, no pH strips, no special starter culture. Just a clean jar, a few cups of berries (maybe the ones you were about to throw out), and a little patience. This is the kind of project that feels like a science experiment and a kitchen hack at the same time.
Why Fruit Kvass Is the Best Budget-Friendly Ferment
Ok so here’s the thing about store-bought probiotics: they are expensive. A four-pack of those trendy gut shots can cost eight dollars, and you finish them in one sitting. For that same price, you can buy two bags of frozen berries and enough sugar to make several jars of homemade fruit kvass. The math is not even close.
Fruit kvass also skips the fussiest parts of fermentation. You do not need to babysit a scoby or maintain a sourdough starter. You mix water, sugar, and fruit in a jar, let it sit for a couple of days, and bottle it. That is the whole process. My first batch used blackberries that were starting to get soft in the fridge, and honestly, they were perfect for this. The fermentation process does not care if your fruit is pretty, it just wants the natural yeast and sugar.
The 10-Minute Jar: What You Actually Need for Berry Kvass
Look, the recipe is embarrassingly simple. You need a large glass jar, a swing-top bottle for the final step, and a fine mesh strainer. The berries in the photo are blackberries, but raspberries, blueberries, or even chopped strawberries work just as well. You also need filtered or tap water (if yours tastes fine, it will ferment fine) and plain white sugar. I have seen recipes with honey, but sugar gives a cleaner, more predictable ferment for beginners.
Here is the basic ratio I use, and it is hard to mess up:
– 2 cups of berries, fresh or frozen
– 1/2 cup of sugar
– 4 cups of water
– 1/4 teaspoon of salt (yes, really, it helps balance the flavor)
Mash the berries slightly in the jar, add the sugar and salt, then pour in the water. Stir until the sugar dissolves. Cover the jar with a cloth or a loose lid so it can breathe, and leave it on the counter for two to three days. The mixture will get slightly bubbly and smell a little tart. That is when you strain it into the swing-top bottle and put it in the fridge for another day to build carbonation.
That Gorgeous Orange-Red Color Is All Natural
I have to talk about the color in that photo. The purple flowers and the dark blackberries in the foreground make the drink look almost like a sunset in a bottle, and it really looks like that. Blackberries release a deep magenta juice, but once fermentation kicks in and the pH drops, the color shifts to that brighter, almost ruby-orange tone. It is a subtle little science trick that happens right in your kitchen.
If you want a deeper red, use raspberries or add a handful of chopped cherries. If you want a lighter pink, go with strawberries. The natural anthocyanins in the berries react to the acidity of the ferment, which is why no two batches look exactly the same. It is weirdly satisfying to watch the color change over the course of a day.
The Wait-and-Sip Game: Patience and Carbonation Tips
The hardest part of this whole budget fermenting process is waiting. Day one is just liquid and mashed berries. Day two starts to smell a little funky (in a good way). By day three, you will see tiny bubbles forming on top, and that is your cue to bottle.
Here is where I have a mildly strong opinion: do not skip the fridge step. After you strain the kvass into the swing-top bottle, let it sit on the counter for just a few hours, then move it to the fridge. The cold slows the fermentation, but the bottle still builds pressure. If you leave it on the counter overnight, you risk a fizzy explosion in your kitchen. Not gonna lie, I learned this the messy way. Blackberry kvass on the ceiling is not a good look.
When you open the bottle, do it over the sink. The first batch I opened sprayed a little, but that just means the fizz worked. You want a gentle fizzy pop, not a geyser. If it does not bubble much, just leave the bottle on the counter for another half day before chilling it again. It is forgiving, so do not stress.
Three Berry Combinations to Keep It Interesting
You are not stuck with plain blackberry. Once you get the rhythm, you can play with flavors. The photo shows a classic blackberry batch, but here are a few combinations that I have tried and actually enjoyed:
– **Blackberry and mint**: Throw a few mint leaves in the jar with the berries. It gives the kvass a fresh, almost tea-like finish. Do not leave the mint in during the fridge ferment, it gets bitter.
– **Strawberry and lemon**: Add a strip of lemon peel (no pith) to the mix. It brightens the flavor and makes the color a lovely pinkish coral.
– **Blueberry and a pinch of cinnamon**: Sounds weird, but the spice adds a warm note that makes it taste like a fancy soda. Use less sugar with this one, the blueberries are pretty sweet.
Each batch will be a little different, and that is honestly part of the fun. The fermentation time, the berry ripeness, even the temperature of your kitchen changes the final taste. It is your own tiny batch of living soda.
How to Actually Use Your Homemade Fruit Kvass
You can just drink it straight, cold from the fridge. That is the easiest way and my favorite way. But a jar of fruit kvass is a nice base for other things too. I like to pour it over ice with a splash of sparkling water if I want a lighter drink. In the summer, I have used it as a mixer with vodka, and it is genuinely great.
The fizzy liquid also makes a fun addition to salad dressings if you want to be extra about it. Swap half the vinegar in a vinaigrette with some berry kvass and you get a slightly sweet, tangy dressing that feels way more complicated than it is. Just shake it up with some olive oil, mustard, and salt, and you are done.
A Few Last Thoughts on This DIY Probiotic Journey
Look, there are a million things you can buy to make your gut healthier, but most of them are overpriced and underwhelming. Making your own berry kvass connects you to the process, and it is so much cooler to say “I made this” than to just unscrew a cap. The jar in the photo cost less than two dollars in ingredients, and it is genuinely packed with living cultures. I call that a win.
So save this budget-fermenting recipe for your next kitchen experiment. Pick up some berries on sale, grab a swing-top bottle if you do not have one, and give it a shot. If you make a batch, come back and tell me which berry combo you tried. I am always looking for a new flavor to test.
Leave a Comment