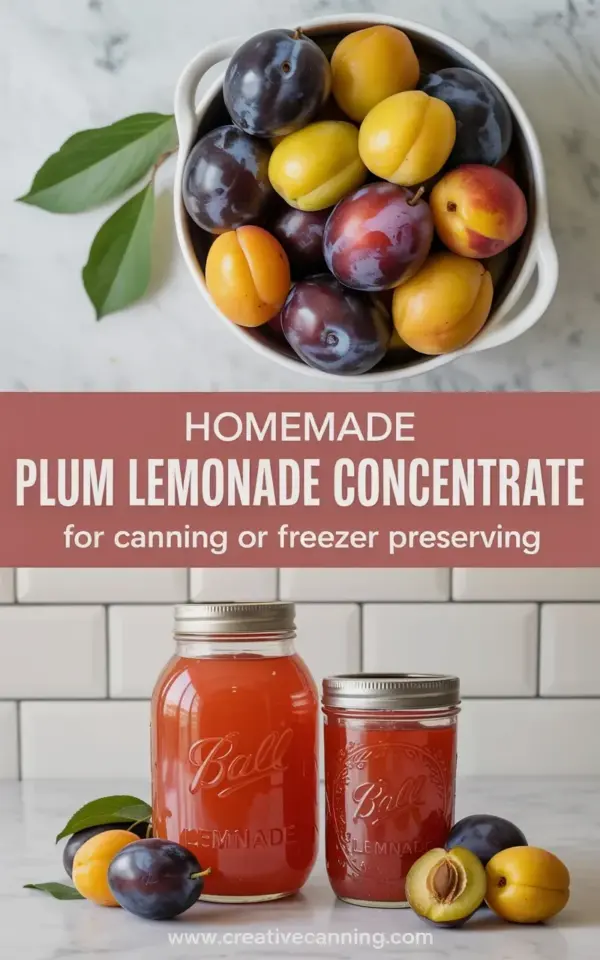
You have a bowl of dark purple plums sitting on your counter right now, and honestly, you’re not sure what to do with them. Your neighbor gave you a whole bag from her tree, and you can’t eat another raw plum without your jaw aching. That’s exactly where this homemade plum lemonade concentrate recipe for canning comes in. It turns that overwhelming pile of summer fruit into glass jars of sweet, tangy, pink perfection that you’ll be pouring over ice all winter.
I’ve made this recipe more times than I can count, and let me tell you, the first few attempts were not pretty. I learned the hard way what goes wrong, what gets wasted, and what turns a lovely batch into a sticky mess. So think of this as your friendly warning label. I’m walking you through the common mistakes so you can skip all my fumbling and get straight to sipping.
Mistake One: Choosing the Wrong Plums for Your Plum Lemonade Concentrate
Look, not all plums are created equal. If you grab the first ones you see at the store, you might end up with a concentrate that tastes more sour than sweet or, worse, a little bitter. For the best homemade lemonade concentrate, you want ripe, sweet plums, usually the dark purple ones (like Santa Rosa or Italian prune plums) that give that gorgeous ruby color.
Underripe plums are the devil here. They’re too tart and they don’t have enough natural sugar to balance the lemon juice. It’s not gonna ruin your batch beyond saving, but you’ll be adding a lot of extra sugar to fix it. And nobody wants that. If your plums are rock hard, let them sit on the counter for a couple of days until they give slightly when you squeeze them.
Here’s a quick checklist for picking plums for canning:
- Look for deep, intense color. If it’s dark purple, even better.
- They should feel heavy for their size, that means they’re juicy.
- Give them a gentle squeeze near the stem. A tiny bit of give is perfect.
- Smell them. Seriously, if they smell sweet and floral, you’re golden.
And a weird little aside: don’t wash them until right before you use them. The natural bloom on the skin helps them last longer, and I’m convinced it also makes them taste better. I have zero science to back that up, but I’m sticking to it.
Mistake Two: Forgetting That Apricots Are Optional But Amazing
That photo you saw, the one with the white ceramic bowl and the single green leaf? It had a gorgeous mix of dark purple plums and golden apricots. That wasn’t just for looks. Adding a couple of apricots to your plumlemonade brings a soft, honeyed background note that mellows out the sharp acidity of the lemon. It’s not a traditional pairing, but it works in a way that’ll surprise you.
If you don’t have apricots, no problem. The recipe stands fine on its own. But if you do have a few lying around, throw them in. I like to use about one apricot for every three plums. They break down beautifully and add a little body to the juice. Just pit them, give them a rough chop, and let them cook right along with the plums.
The color gets even better too. The orange of the apricots blends with the purple plum juice to make a deep coral that looks exactly like the text in that photo. It’s almost too pretty to drink. Almost.
Mistake Three: Not Prepping Your Mason Jars Before You Start Cooking
You’ve heard the saying “fail to prepare, prepare to fail.” I learned this one the hard way when I had a pot of boiling plum juice and no clean jars in sight. Panic is not a good canning ingredient. If you’re planning on canning this concentrate for shelf storage, get your jars washed, sterilized, and kept hot (in the oven or a pot of water) before you even turn on the stove.
For freezer preserving, you’re in luck. You don’t need to sterilize jack. Just make sure your mason jars or plastic freezer containers are clean and dry. Actually, really dry. I always let mine air dry completely because extra water in the jar can water down the concentrate. It also makes the freezing process a little weird, you’ll get ice crystals on top that might taste like faintly fruity water. Not the end of the world, but why risk it?
And here’s a pro tip for both methods: leave at least an inch of headspace at the top of the jar. Liquids expand when they freeze. If you fill a jar to the brim, you’ll come back to a shattered glass mess in your freezer. Trust me on this one.
Mistake Four: Boiling the Juice for Too Long and Muddling the Flavor
This is a big one, and I see it all the time. People think that to preserve summer fruit, you need to boil it into oblivion. That’s completely wrong. Overcooking plum juice does two bad things: it darkens the color to a murky brownish purple, and it gives the concentrate a weird, slightly overcooked jam flavor that masks the fresh plum taste.
You only need to simmer the plums and apricots until they’re soft and have released their juices. That’s usually around 10 to 15 minutes. Then you strain it, add the sugar and lemon juice, and heat it just until the sugar dissolves. You’re not making jam here, so don’t treat it like jam.
I like to use a potato masher to gently press the softened fruit against the pot. This gets out more juice without breaking the seeds or skins into tiny pieces that clog your strainer. And speaking of straining, use a fine mesh sieve lined with a couple layers of cheesecloth if you want a perfectly clear concentrate. I actually skip the cheesecloth because I like a tiny bit of pulp in mine. It makes the lemonade feel more like an old fashioned summer drink.
Mistake Five: Guessing the Sugar and Lemon Balance
Homemade plum lemonade concentrate is a balancing act. Too much sugar and it’s cloying syrup. Too much lemon and you’ll pucker your face off. I’ve seen recipes that call for a shocking amount of sugar, but I think that’s just because the authors were using underripe plums. If you start with sweet, ripe fruit, you don’t need to go overboard.
My ratio for a batch that makes about 4 pints is simple:
- 4 pounds ripe plums, pitted and halved
- 1 pound apricots, pitted and quartered (optional but great)
- 3 cups water
- 1 and a half cups granulated sugar
- 1 cup fresh squeezed lemon juice (about 5 to 6 lemons)
That’s for a concentrate, so you’ll mix it with water or sparkling water later. Let it cool, taste it, and adjust the sugar or lemon before you jar it. Want a little more zing? Add another squeeze of lemon. Too tart? Stir in a spoonful of sugar. Your taste buds should be the final judge, not some recipe written on the internet.
And do yourself a favor, use fresh lemons for your homemadelemonade. The bottled stuff in the plastic squeeze bottle has this weird bitter aftertaste that just doesn’t belong with beautiful summer plums. Fresh juice takes an extra five minutes, and it makes all the difference.
Mistake Six: Forgetting to Label and Date Your Jars
Ok so this one sounds like a no-brainer, but I’ve been caught red handed. You put a jar of plum concentrate in the freezer next to a jar of grape jelly and a bag of raspberries, and three months later, you have no idea what’s what. They all look similar when they’re frozen and dark.
Grab a permanent marker and write the date and the contents directly on the lid or on a piece of painter’s tape stuck to the jar. Include a note if you made a variation, like “extra lemon” or “no apricots.” Future you will be so grateful.
Also, if you’re using mason jars to freeze, make sure you’re using the straight sided ones, not the ones with an exaggerated shoulder that can crack more easily. And only use new lids for canning, but for freezer preserving, you can reuse the rings and lids as long as they’re clean. That saves you a little money, and honestly, nobody will ever know.
Mistake Seven: Not Making a Big Enough Batch in the First Place
This is the mistake I make every single summer. I think, “Oh, I’ll just make a little bit,” and then by November, I’m rationing my last jar and sulking. The whole point here is to preserve summer, so don’t be shy. Make a double batch. Plums are cheap when they’re in season, and the process takes about the same amount of time whether you’re peeling one bowl or three.
A full batch of this plum lemonade concentrate will fill about four or five pint jars. That’s enough for a whole summer’s worth of nostalgia, but it goes fast. I promise you’ll be drinking it more often than you expect. I mix it with cold water and a handful of ice, but last weekend I used it in a gin cocktail, and it was fantastic. Just saying.
When you’re ready to serve, the ratio is usually one part concentrate to three or four parts water. Start with three and add more if you like it less sweet. You can also use it in iced tea, drizzled over vanilla ice cream, or stirred into sparkling water for a quick soda.
You Can Actually Can It. Let’s Talk About Safety.
I’ve been going on about freezer preserving this whole time, but the title mentions canning, so let’s get into that. This plum lemonade concentrate recipe is acidic enough (thanks to all that lemon juice) to be safely processed in a boiling water bath canner. You won’t need a pressure canner, which keeps things simple.
Fill your hot sterilized jars with the hot concentrate, leaving a half inch of headspace. Wipe the rims with a clean damp cloth, put on the lids and rings, and process for 10 minutes for pints at sea level. Make sure to adjust that time if you’re at a higher altitude. After it’s done, let the jars cool completely and listen for that satisfying little pop of the lids sealing. It’s one of my favorite sounds of the summer.
If a lid doesn’t seal, don’t panic. Just pop that jar in the fridge and use it within a week or two. The concentrate will taste just as good, it just won’t keep on the shelf.
One more thing about canning. Don’t be tempted to double the recipe and process your jars for longer to be “safe.” Over-processing gives you that same cooked, dull flavor I mentioned earlier. Stick to the time and trust the acid content. It’s a proven formula.
And that’s really everything I’ve learned from my sticky kitchen mistakes to my cozy winter lemonades. Homemade plum lemonade concentrate is one of those little gifts you give to yourself in the middle of January. It tastes like remembering a good day. And it’s not hard, you just need to avoid the pitfalls I stumbled into.
So go grab those plums, my friend. Get them simmering, get your jars ready, and make a mess of a beautiful, delicious thing. If you come up with a weird new ratio or a serving idea, I’d love to hear about it in the comments. Let’s keep summer alive together.
Leave a Comment