Why That Colorful Layer Trick Actually Matters
Honestly, the first time I tried making homemade sauerkraut, I just dumped shredded cabbage into a mason jar and shoved a weight on top. It looked terrible. Grayish and sad. But also? It grew mold within a week. I was so frustrated. Then a friend told me I had to pay attention to the color layering inside the jars. Not just for looks. That observation changed everything for me. So look, if you mess up your homemadesauerkraut because of air pockets and fuzzy growths, this one tip might save your next batch.
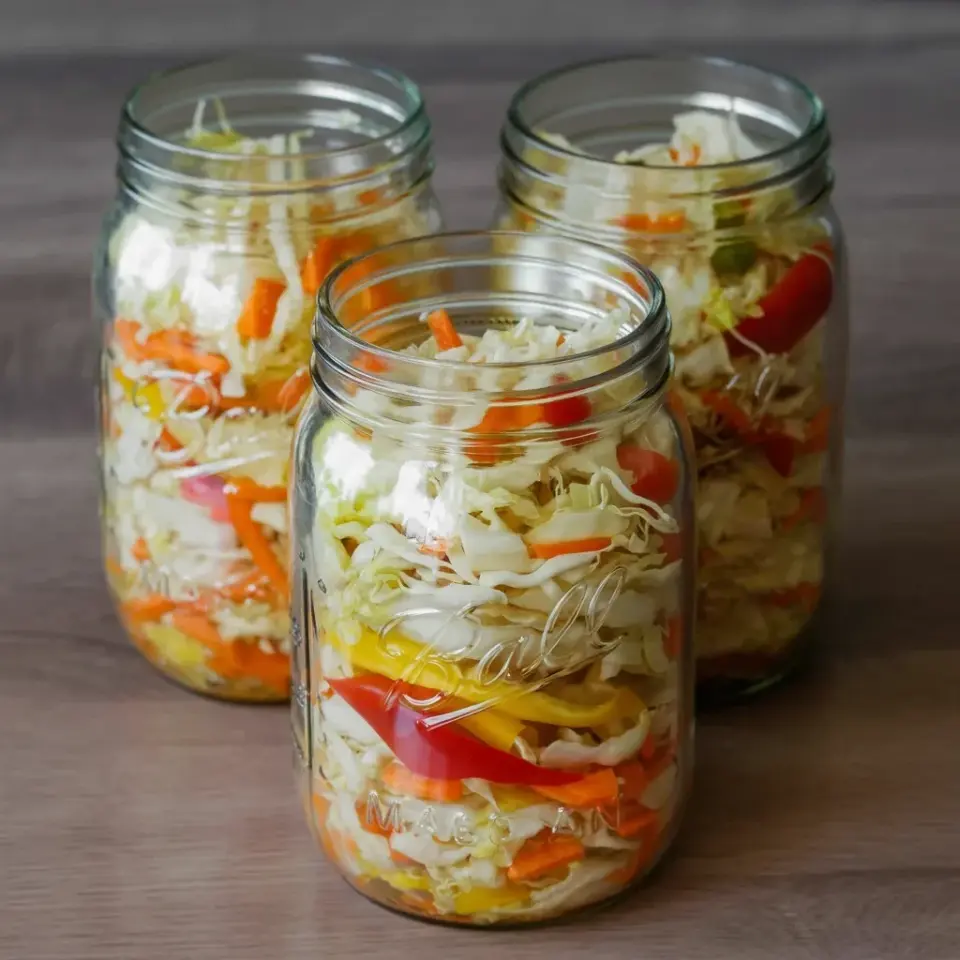
You see those jars in the photo? Three mason jars on a light brown wooden surface. Each one has distinct stripes of finely shredded white cabbage, bright orange carrots, and red bits of bell pepper. It’s not a decoration. That alternating pattern packs the vegetables tight so no air gets trapped. Air pockets are the enemy. They let oxygen in, and oxygen invites mold. So the layers aren’t just pretty; they are functional engineering.
I Learned the Hard Way: My First Moldy Batch
Ok so my first real attempt at fermentedvegetables was a disaster. I used a big glass bowl and a plate. The cabbage floated to the top, exposed to air, and within three days I had a fuzzy white cap. Gross. I almost quit right there.
But then I switched to mason jars. Mason jars are narrower. They force you to pack ingredients in layers. Here’s the thing: when you alternate colors, you’re forced to press each layer down firmly before adding the next. That physical action pushes out the tiny air bubbles. And since cabbage, carrots, and peppers have different textures, they lock together like puzzle pieces. Way less chance of floaters. Also, the carrots stay crunchy and the peppers keep their color. I learned that the hard way after two more sad batches.
(One weird side note: my cat loves to sit on the counter and watch me pack the jars. She doesn’t care about fermentation. She just likes the repetitive thumping sound. Whatever, I’ll take the company.)
How to Build Perfect Layers in a Mason Jar
You don’t need fancy equipment. Just a mason jar, a wooden spoon handle, and your veggies. Start with a bottom layer of shredded green cabbage, about two inches thick. Press it down firmly with your fist or a tamper. Squeeze until you see liquid rise above the cabbage. That brine is your mold-protection shield.
Then add a thin layer of grated carrot. Not too thick. Maybe half an inch. Then a scattering of red bell pepper strips. Then cabbage again. Repeat until the jar is full, leaving about an inch of headspace. The goal is to create a tight column where the vegetables don’t settle and create gaps.
Here’s a quick bullet list of tips I wish someone had told me:
- Shred your cabbage fine, not chunky. Fine shreds pack denser and release more liquid.
- Grate carrots on the large holes of a box grater. Don’t use baby carrots, they’re too firm.
- Use red bell pepper, not green. Red is sweeter, softer, and it looks gorgeous against the white cabbage.
- Pack each layer so hard that brine pools on top. If you don’t see liquid, add a little salt water (2% brine).
- Leave that headspace! Fermentation expands. Skip that and you’ll have brine all over your counter.
The Science (Super Simple Version) Behind Layering
Don’t worry, I’m no microbiologist. But I’ve read enough to explain this in plain English. When you pack cabbage tight, you break cell walls. That releases sugars and water. The salt you mixed in draws out even more moisture. That liquid becomes the brine. Brine is an anaerobic environment (no oxygen). Good bacteria love that. Bad mold hates it.
Layers create multiple small zones where brine can cling between the vegetables. A solid block of cabbage might have hidden pockets. But alternating colors? You’re building a grid. Carrots and peppers are less watery than cabbage, so they act like spacers that allow brine to flow through every crevice. Honestly, I didn’t understand this until I cut open a failed batch. The mold was always hiding inside a dry air pocket. Layers destroy those pockets.
My Favorite Sauerkrautrecipe for Beginners
If you want to replicate those jars in the photo, here’s exactly what I do. It’s a simple sauerkrautrecipe you can remember without writing down. Start with one medium green cabbage, two large carrots, and one red bell pepper. Shred the cabbage. Grate the carrots. Slice the pepper into thin strips. Weigh your vegetables. Multiply the weight by 0.02 to get your salt amount (2% by weight). Yes, you need a kitchen scale. I’m serious.
Massage the salt into the cabbage only (skip the carrots and peppers for now). Let it sit 15 minutes until liquid pools. Then start layering. A cabbage layer, press. Carrot layer, press. Pepper layer, press. Repeat. Fill the jar, put a glass fermentation weight on top, screw on the lid loosely. Keep it at room temperature (65-72°F) for 7 to 14 days. Taste after one week. I like mine at 10 days. It’s tangy, crunchy, and the carrot stays bright orange. Not gonna lie, I eat it straight out of the jar with a fork.
A Few Fermentingtips for Avoiding Mold Completely
Look, even with perfect layers, mold can still happen if your brine is too weak or your jar isn’t clean. So here are my top fermentingtips: always use filtered water if your tap water has chlorine. Chlorine kills the good bacteria. Also, never open the jar during the first week unless you see a problem. Every time you open it, you introduce oxygen.
Another tip? Keep the vegetables submerged. Use a glass weight, a clean rock, or even a smaller jar filled with water. If anything floats above the brine line, scrape it off immediately. That’s where mold starts. And honestly, if you do get a tiny spec of mold on top, don’t panic. Scoop it out and check the layers below. If they smell fine and look good, you’re probably safe. But if it’s fuzzy and spreading? Toss the whole batch. I’ve thrown out two jars in my life. It stinks emotionally, but it’s better than eating something risky.
Why This Method Looks So Good on Your Counter
Let’s be real: I also layer my jars because they look beautiful sitting on my kitchen counter. That photo with the three mason jars on the wooden surface? That’s exactly how mine look after a week. The white cabbage, the orange carrot stripes, the red pepper flecks, it’s like edible art. It makes me feel like a fancy homesteader, even though I live in a small apartment.
And when friends come over and ask what’s in the jar, I get to explain the whole fermentation process. They usually say “that’s so cool” and then never try it themselves. But I keep making it. The layers are my secret weapon. They prevent mold, they pack tight, and they make me smile every time I see that rainbow of colors through the glass.
Final Thoughts (and a Nudge to Try It)
So don’t skip the layers. Seriously. That one change turned my sauerkraut from a moldy science experiment into a reliable, delicious pantry staple. Next time you buy a cabbage at the store, grab a carrot and a red pepper too. Spend the extra three minutes stacking the colors. Your gut bacteria will thank you. Your taste buds will thank you. And you’ll have a jar on your counter that looks like a little jewel.
Try it this weekend. Let me know how your batch comes out. And if you have any other weird fermentation stories (like my cat watching complexly), drop them in the comments. I love hearing about other people’s kitchen adventures.
#homemadesauerkraut #fermentedvegetables #masonjarfermentation #sauerkrautrecipe #fermentingtips
Leave a Comment