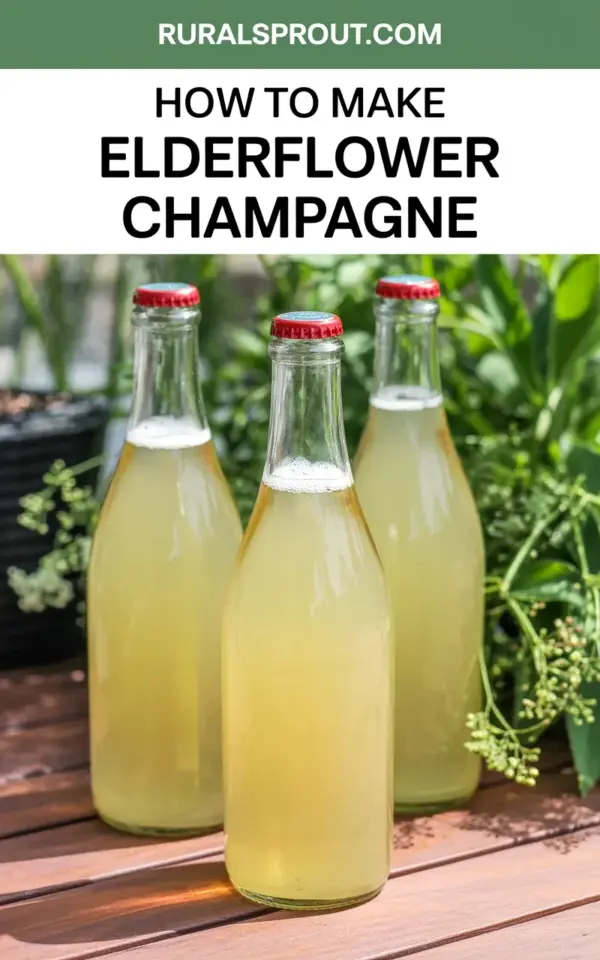
The photo on my deck says it all: three clear glass bottles of homemade elderflower champagne, pale gold and frothy under their red caps, with the garden melting into a green blur behind them. This is the exact summer mood I chase every year, and honestly, it is easier to make than you think. If you want to bottle that cozy garden feeling yourself, this elderflowerchampagne recipe is for you.
I first tried making homemade bubbly because I was cheap, impatient, and slightly annoyed at paying twelve dollars for a bottle of fancy sparkling cordial. Turns out, the DIY version is better, and it costs pennies. Before we get into the weeds, let me say this: you do not need special equipment, a wine cellar, or any kind of skill. You need flowers, sugar, water, and a little patience.
## The Ingredients and Supplies You Need for Homemade Elderflower Bubbly
This is not a fussy recipe. In fact, the ingredient list is almost embarrassingly short. You will need 8 to 10 large elderflower heads, one lemon (organic is best), roughly 750 grams of white sugar (that is about 3.5 cups), 4 liters of water, and a splash of white wine vinegar.
The vinegar sounds weird, I know. It cuts the sweetness and helps the fermentation start cleanly. Do not skip it.
For supplies, you need a big pot or bucket, a clean cloth for straining, and bottles that can handle pressure. I use swing-top glass bottles like the ones in the photo on my deck. Not gonna lie, the red caps in that picture are just the rubber seals on the flip-top lids, and they look ridiculously charming in the sunlight.
## The Simple Step-by-Step Process for a Garden Fizz
Pick elderflowers on a dry, sunny day. Seriously, do not pick them after rain, the pollen and flavor wash away. Give them a gentle shake to dislodge any tiny bugs, but do not rinse them.
Here is the basic flow:
– Combine the sugar and water in your big pot. Stir it well to dissolve as much as possible.
– Add the elderflower heads and the lemon, which you should slice thin, rind and all.
– Stir in the vinegar.
– Cover the pot with a cloth and leave it alone for 24 to 48 hours.
– Strain everything through the cloth, squeezing the flowers to get every drop of flavor.
– Pour the liquid into your bottles, leaving a few inches of space at the top.
That is it. The mixture will start fermenting on its own because the flowers carry wild yeast. You do not add yeast, you just let nature do its thing. The whole process feels a bit like magic, honestly.
## Why the Sediment is Normal and Not a Disaster
Around day two or three, you will notice a yellowish sludge settling at the bottom of your bottles. This is exactly what the inside of a wine cellar looks like, it is just dead yeast and plant bits. It is totally fine.
Two things to know about this sediment: first, it does not mean you ruined it. Second, you should pour carefully when serving so the sludge stays in the bottle. I usually keep the last little sip in the bottle and toss it. It is not harmful, but nobody wants a cloudy, chunky gulp at the end of a nice glass.
The effervescence you see in that photo, that frothy little head on the pour, comes from the fermentation building up pressure inside the closed bottle. It is a delicate balance. Taste it every day starting around day four.
## Bottling, Burping, and the Fine Art of Not Blowing Up Your Kitchen
Here is the thing about making your own fizzy drinks: they can explode. I am not exaggerating. If you let the pressure build too much and the bottle is weak, or if you leave it in the sun, you will have a sticky glass bomb on your hands. Look, I have been there.
To avoid this, I burp the bottles daily. This means opening the cap just a tiny bit for a split second to release pressure, then closing it again. I do this every single day until the fizz level tastes right.
There are a few signs that your homemade bubbly is ready, and they are all visible in the photo:
– The liquid turns a pale, almost translucent yellow.
– Tiny bubbles stream continuously from the bottom of the bottle.
– When you gently swirl the glass, the foam gathers at the top like a real champagne mousse.
At that point, move the bottles to the fridge. The cold stops the fermentation process and keeps the flavor fresh.
## How Long Until You Can Drink It, and What Does It Taste Like
My first batch tastes good around day five, but the flavor really develops at the two-week mark. The initial sweetness fades, the floral notes deepen, and it develops that slight, champagne-like tang that makes it feel fancy.
The taste is hard to describe because it is so unique. It is gently floral, but not perfumey like those lavender lattes from the overpriced café downtown. It is sweet, but the vinegar and fermentation add a honeyed, bready undertone that grounds it. It is way less sweet than lemonade, way more interesting than sparkling water.
Serve it ice cold on the deck, right where you made it. I am convinced that sipping it while looking at the garden blur in the background makes it taste even better.
## Storing Your Batch and Tweaking the Recipe Next Time
You can store these bottles in the fridge for about a month, but honestly, they never last that long in my house. The fizz stays strong for about three weeks, then it starts to fade as the yeast dies off.
Next time you make a batch, try one of these tweaks:
– Add a handful of fresh mint leaves to the brew for a cooler, greener taste.
– Swap half the white sugar for honey. It changes the flavor profile completely and makes the fizz slightly finer.
– Toss in a few strawberry slices during the last few hours of steeping for a pink-tinted summer drink.
– Use limes instead of lemons for a sharper, more citrus-heavy finish.
This is the kind of recipe where you will definitely adapt it to your own taste. The process is forgiving, so play around with it. Even a mediocre batch of homemade bubbly beats most store-bought sodas.
## A Few Final Thoughts on Cozy Garden Living
This drink is not about perfection. The bottles might not be perfectly clear, the sediment might settle oddly, and you might lose a bottle or two to over-fermentation. That is part of the experience. When you sit on that deck, looking at the green foliage and the golden liquid in your glass, it feels like a real accomplishment. It is a tiny piece of summer, preserved in a bottle.
So go pick some elderflowers, find a sunny spot, and make a batch. I promise you, the cozy living vibes are baked right into the process, you just have to do it once to believe it. Have you tried making your own homemade bubbly? I would honestly love to know how it turns out.
Let me know below, or save this post for elderflower season and come back when the flowers are blooming. Your future deck awaits.
Leave a Comment