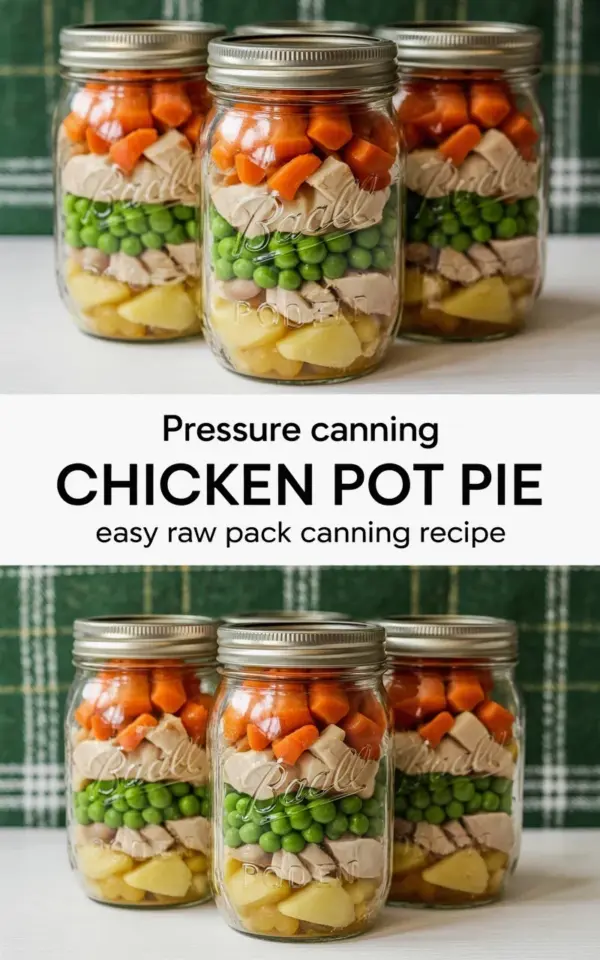
These pressure canned chicken pot pie jars are a lifesaver for busy nights. I did a raw pack with diced chicken, carrots, peas, and golden potato chunks – all layered in mason jars. The top image in my photo shows three clear jars standing in a row, filled with those bright orange carrots, green peas, and white chunks of chicken. The bottom image shows four identical jars with the same layered ingredients, only now the golden potato chunks join the party. It is meal prep art, honestly. Ready to heat and serve whenever you need a cozy meal. Let me walk you through the ideas that make this method work.
The Raw Pack Shortcut (Skip the Pre-Cook Guilt)
Raw pack is simpler. There, I said it. Instead of browning the chicken and parboiling the veggies, you just stuff everything into the jar raw. Not gonna lie, the first time I tried pre-cooking everything for a hot pack, I ended up with a jar of mushy potatoes and dry chicken. Never again.
Here is the thing about raw pack for chicken pot pie jars: the texture stays distinct. The chicken stays tender, the carrots keep a little bite, and the potatoes do not dissolve into the broth. It saves you a solid forty minutes of dirtying pans. Just dice, layer, and lid. That is worth it for a Tuesday canning session.
Building the Perfect Layers (A Visual Guide from the Photo)
Look at the photo closely. The three jars in the top image are a masterclass in simplicity. Chicken on the bottom, carrots next, peas sprinkled through. The bottom row with four jars adds the golden potato chunks. I specifically use golden potatoes because they hold their shape. Russets turn to gravel.
My personal layering order? It is non-negotiable for me:
- Chicken chunks go on the bottom. They shrink during processing, so pack them tight.
- Carrots come next. I dice them thick, like a quarter inch. They look gorgeous against the glass.
- Green peas get sprinkled in the middle. They float anyway, so do not worry about where they land.
- Golden potato chunks go on the very top. This keeps them from sitting in the liquid and turning to mush before the jar is opened.
Do not press the layers down hard. Let them sit naturally. The broth will fill the gaps during processing.
Ingredient Choices That Actually Matter (Chicken, Spuds, and Peas)
Not all chickens are created equal. I use boneless skinless thighs half the time because they stay juicier than breast meat. Breasts work fine, but they can get a little dry if you over-process them. Dice them into one-inch cubes. Bigger pieces look better in the jar.
My grandma used to add a single bay leaf to each jar. I do it too, even though I can never really taste it in the final dish. It just makes me feel like I did it right. Weird? Maybe. But it is my jar, my rules.
Carrots should be fresh, not limp. Peas can be frozen. Honestly, frozen peas hold up better than fresh ones in the pressure canner. They retain that pop of green sweetness. Potatoes? Golden. Always golden. They are buttery and waxy enough to survive the high heat.
Busy Night Dinner (From Shelf to Table in 10 Minutes)
Ok so the whole point of these pressure canned chicken pot pie jars is to have a cozy dinner without the work. Open a jar. Pour it into a small saucepan. Bring it to a bubble.
If you want it thicker, mix a tablespoon of cornstarch with cold water and stir it in. Let it simmer for a minute. Done. Serve it over a split biscuit, a puff pastry shell, or honestly just eat it with a spoon straight from the bowl. I have done all three.
This is meal prep that actually works. I store the jars in my pantry, not the fridge. They are shelf stable for over a year. When the zombie apocalypse hits or just when I am too tired to cook, I have a hot meal ready.
Pressure Canning Safety (The Part You Cannot Skip)
Look, I am not a scientist. I just follow the USDA guidelines like my life depends on it. Because it does. You absolutely cannot water bath this recipe. Chicken is a low acid food. It must be pressure canned to kill botulism spores.
I process pints at 11 PSI for 75 minutes. Quarts go for 90 minutes. Adjust the pressure for your altitude. I live at 1000 feet, so I run my weighted gauge at 15 PSI just to be safe. Do not wing it. Check your dial gauge every year. It is a cheap way to avoid a very bad outcome.
Safety is not where you get creative. Stick to the time tables. Stick to the headspace (1 inch for raw pack). Wipe the rims. Clean seals. Hot rims. Tight bands. You know the drill.
Scaling Up for a Pantry Full of Pot Pie Jars
If you are going to do this, do a big batch. A full canner load is 7 quarts or 9 pints. It takes the same amount of time to prep one jar as it does ten. Block out an afternoon. Put on a podcast. Drink some coffee.
Here is what you need for a massive batch of raw pack chicken pot pie jars:
- 10 pounds of chicken. Thighs and breasts mixed. Dice it all at once.
- A good peeler. I have a weird thing about peeling carrots. I hate the little nubs. A serrated peeler changed my life. Seriously.
- Patience for potatoes. Peeling golden potatoes takes forever. Just accept your fate. Do not use a food processor, it makes them jagged.
- Lots of broth. You need hot liquid to pour over the raw pack. I use unsalted chicken broth so I can control the sodium myself.
Pack the jars tight. The layers
#canning #pressurecanning #rawpack #chickenpotpie #mealprep
Leave a Comment