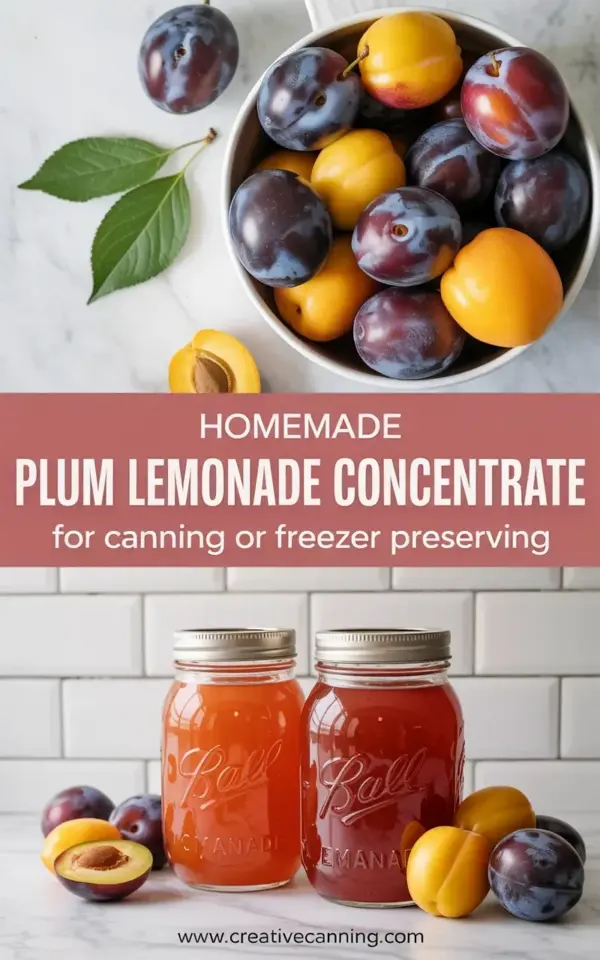
Three pounds of dark purple plums sit in a white ceramic bowl next to a heap of golden apricots, and honestly, that is where all good summer plans start. This homemade plum lemonade is the drink I look forward to all year, the one I actually hoard in my pantry. It is a concentrate, which means you are getting maximum flavor in a small jar, ready to be splashed into a glass of cold water or shaken into something stronger at five o’clock.
The best part? You can process it in a water bath canner for shelf-stable jars, or you can skip the heat and just freeze the whole batch. Both methods work beautifully. Both methods give you that gorgeous, jewel-toned drink that tastes like a farmer’s market in August. Let me walk you through exactly how I do it, including the little tricks I have learned from making this recipe every single summer for the past five years.
Apricots are not optional here. I know some recipes leave them out, but that is a mistake. The apricots add a subtle, honey-like warmth that rounds out the sharp edge of the lemon and deepens the fruity flavor of the plums. It is the difference between a good lemonade and one that people ask about. Trust me on this one.
Why Plums and Apricots Belong in Your Lemonade
Plums are naturally high in pectin and acid, which makes them fantastic candidates for canning, but their flavor can be a little one-note if you do not help it along. Apricots bridge that gap perfectly. They bring a soft, almost jammy sweetness that plums lack, and they help create a smoother, rounder mouthfeel in the final drink.
When you combine those two fruits with fresh lemon juice, you get a concentrate that is tart, fruity, and deeply refreshing. It is not overly sweet like the stuff you buy in a bottle. It is bright and a little bit complex. Plus, the color is unreal, a deep magenta that looks stunning in a tall glass with lots of ice.
What You Need (Plus a Note on Sourcing)
Let me put together the shopping list for you. You will need the following for a batch of roughly seven to eight pint jars:
- 4 pounds ripe plums, pitted and roughly chopped
- 2 pounds ripe apricots, pitted and roughly chopped
- 3 cups fresh lemon juice (about 12 to 15 lemons)
- 3 to 4 cups granulated sugar, adjusted to taste
- Water, for cooking down the fruit
- A water bath canner or freezer-safe jars or containers
Find fruit that is soft and fragrant at the stem. If the plums are hard, they will still work, but you will get a less intensely flavorful juice. The apricots should smell sweet and floral, not just look pretty. I have made this with slightly underripe fruit before, and while it was fine, the juice was noticeably thinner. Look for the good stuff. Your future self will thank you.
How to Make Plum Lemonade Concentrate
Start by washing all your fruit thoroughly. I know it is tempting to skip this step, but you are not peeling these plums and apricots, so you want them clean. Cut the fruit in half, remove the pits, and chop everything into roughly equal-sized chunks. Toss the chopped fruit into a large, heavy-bottomed stockpot and add just enough water to cover the bottom by about half an inch.
Bring the fruit to a simmer over medium heat, then reduce the heat to low. Let it cook, stirring occasionally, for about 15 to 20 minutes. You want the fruit to break down completely and release all its juice. The texture will look like a thick, chunky compote. Once it is soft and mushy, you will need to extract the liquid. For me, the easiest way is to process it in small batches through a fine-mesh strainer lined with cheesecloth, pressing firmly with the back of a ladle to get every last drop of juice.
Now, here is a quick trick I learned the hard way. Do not twist or wring the cheesecloth too aggressively. You will end up with cloudy sediment in your juice that clouds the final product. Just press gently, let gravity do most of the work, and accept that there is a little bit of pulp in there. That pulp holds flavor. There is nothing wrong with a slight haze in a homemade juice.
Canning vs. Freezer Preserving: Which Method Is Right for You?
This is where you decide how you want to store your summer. Both methods have distinct advantages, and honestly, I use both depending on my mood and energy level on canning day.
For canning, you will bring your strained juice to a boil and stir in the sugar until it completely dissolves. Keep it at a rolling boil for a minute or two. Then, carefully ladle the hot liquid into sterilized pint jars, leaving about a quarter-inch of headspace. Process the jars in a boiling water bath for 15 minutes, adjusting for your altitude. The hot juice mixture needs to be properly acidified with the lemon juice, and the processing time ensures a safe seal.
For freezer preserving, I do it a little differently. I cool the juice completely first, then stir in the sugar until it dissolves. This avoids the need to boil the juice after it is prepared. I pour the mix into sturdy freezer jars or BPA-free plastic containers, leaving about an inch of headspace for expansion. The concentrate will freeze solid, and it will keep for up to a year without losing any of its fresh fruit flavor. Honestly, the freezer method often tastes closer to fresh fruit, since you are not cooking it as much after extraction.
How to Use Your Plum Lemonade Concentrate
The most basic way is to mix the concentrate with water, but the ratio is entirely up to you. For me, a good starting point is one part concentrate to three parts cold water over a tall glass of ice. If you like a sharper, more tart lemonade, add a splash more water. If you want a syrup-like intensity for cocktails, use it straight.
Sparkling water makes a phenomenal summer drink. Fill a highball glass with ice, add a quarter cup of the concentrate, and top it off with chilled club soda or sparkling mineral water. The bubbles cut through the sweetness and make the fruit flavor taste even brighter.
And for a cocktail base? This stuff is a game changer. Stir two ounces of the concentrate with one and a half ounces of vodka or gin, a squeeze of fresh lemon, and a big sprig of mint. Or keep it simple with a splash of bourbon over ice. I like to make a version with tequila and a pinch of salt for a kind of plum margarita. It is dangerously easy to drink.
A Few Storage and Yield Thoughts
This recipe gives you about seven to eight pints, which sounds like a lot until you realize how quickly you go through it. Honestly, a pint jar disappears in about two days at my house. If you want a smaller batch, you can easily halve the recipe. I would recommend starting smaller if you are new to canning, just to get comfortable with the process.
One small warning: the concentrate is thick. It is syrupy and viscous, not watery like a store-bought juice. This is a good thing. It means you are getting concentration of flavor, not diluted sugar water. If you find it too thick after thawing, just whisk in a little water or extra lemon juice to loosen it up.
Regarding the fruit boil, you will see some foam rise to the surface as the juice heats with the sugar. Skim this off with a metal spoon. That foam is just coagulated protein and solids from the fruit, and while it is harmless, it can make your jars look cloudy and unappealing. A quick skim gives you that clear, gorgeous, coral-toned juice that looks so beautiful in the jars. The photo shows that color perfectly, that deep pinkish-orange hue that makes you want a glass immediately.
Do not be afraid to adjust the sugar to your taste. Some plums are sweeter than others, and the ripeness of the apricots changes things too. Taste the juice after you stir in the sugar and see if it hits the spot. You can always add more, but you cannot take it out.
The process does take a little time, maybe an hour and a half from start to finish, but most of that is passive simmering and waiting for water to boil. It is a very satisfying way to spend a hot afternoon, puttering around the kitchen with a glass of something cold nearby, watching the fruit break down into pure summer flavor. There is something deeply rewarding about lining up those sealed jars on the counter, knowing you have put a bit of the season away for later.
So save this recipe, make a big batch, and give yourself the gift of summer on tap. Whether you are loyal to your water bath canner or your freezer shelves, you will be glad you did. And when the weather turns cold, one jar will take you right back to the peak of stone fruit season.
Leave a Comment